Monday, October 17, 2022

🩸 πŸ’€Gothic Earrings skull πŸ’€ 🩸

​Getting ready for Halloween?


Yes I’m . I made an easy pair of earrings. 

But before that I have to share a small story.

————-πŸ’€———-🩸————πŸ’€——

So I had a pair of Skull beads in my stash which I picked from Hobby Craft somewhere near Thames valley during our stay In Reading. That  time I was just starting with crafty ideas had no idea which , where what to find . And my husband was traveling daily by train . He spotted the Hobby Craft shop in a nearby town and he took me there over one weekend. So much memory over just a bead πŸ˜‡.

I used it to make Pair of earrings, the pointed red crystals perfect addition for a simple gothic earrings . What do you think. Tutorial available on YouTube & Pinterest.


πŸ“Œ Pinterest : https://pin.it/35EPyGm

How To Make Gothic Earrings ? Day of Dead Jewelry / Halloween themed Jewelry Making:


This tutorial shows you how to make handmade skull & bleed earrings in few quick and easy steps: Supplies Needed :-

• Skull πŸ’€ Beads 

• Drop red beads 

• Jump rings

• Eyepins 

• Earwires

• Pliers ( round & cutter) 


These skulls from my stash I bought from Hobby craft Reading, uk back in 2014. Those red crystals are from my recent Aliexpress haul. Jump ring from Firemountain Gems and beads. 


Steps:

• Slide skull to eyepin. Trim if required 

• Add crystals ( indicating bleeding drops)🩸 using jump ring 

• Connect all together into earrings.


Let’s say Boo together… Boooo ! Hope you are loving my contents . Please save & share. πŸ’Œ


Friday, September 23, 2022

Pine Cone Moose

​Let’s do some nature crafts.

Wondering what ?

Nothing big …

Collect some Pine cones.


You can either pick some outside they are plenty. Wash it thoroughly preferably using bleach. Let them dry in sun or in oven bake 5-10 minutes.

Or easy way ! Grab a bag from dollar store. 

PINE CONE MOOSE Making

  WATCH HOW TO MAKE πŸ‘‡πŸΎ


https://pin.it/ScGW9NL


Pine Cone Crafts / Diy Moose From Pinecones And Twigs / Nature Crafts: Let’s make an animal using pinecones / twigs / wooden Beads. 


What you need:

• Pine cones ( full & separated pieces for ears & tail )

• Dry Twigs ( thick for legs, thin for antlers)

• Oval wooden bead for head

• Red round wooden bead for nose

• Glue Gun 

• Twine for hanging 


Glue all pieces in place as shown. This is a perfect activity for doing with kids . But take care of glueing hazards. 


Hope you like this . Please share & save .


Thank you 😊❤️


Native American Beaded Fringe Earrings

​Hello My Dears,

Happy Fall !

Sorry for being absent for couple of months. 

Let’s come straight to the topic. I wanna show you my beaded Fringe earrings. I used Blue- Red White colors as I have done it around July4. Native American patterns are so mesmerizing, you know. Here I did a very basic pattern. 

Watch the video below πŸ‘‡πŸΎ:

Native American Fringe Earrings Beading DIY 

Supplies Needed:

11/0 miyuki seed beads 

3mm ( I guess so )Pearls 

Fireline ( any beading thread)

Beading Needles 

Ear wires 

Brick Stitch

Begin with LADDER and then BRICK stitch to build the basic rows . Decrease to form a triangle. This is where we attach earrings hooks. Now pass the thread down to the first row. 


Start adding fringes at the desired length. Knot the thread and weave through. Trim the thread. Melt the ends. 


πŸ‘†πŸΌThis is how  it should look like this.


Finally add the ear wires . 


Done ✅ 

Hope you enjoyed this beading pattern. 

Lemme know what do you think.


Thank you 😊 


Wednesday, June 8, 2022

Think Out Of The Box !!!

​The phrase is a cliche. You might have heard it every now & then in your entire life time so far and fed up of hearing it ! I know .

The prototype

Here I’m talking about an earrings idea. I have been working like this since 2014. What led me to think about it is I need to give a brief story. 


When I started making my own earrings, fish hook earring findings were easy to use. No body in person taught me working with clay . I learned from internet following great artists- Ginger , Cindy, Cynthia , Marie Segal , Anna Oskina , Rusalina etc are very few of them. It’s sad that last day Marie left us forever. I read their writings , blogs, watched videos . I joined groups on Facebook.  These gave me so much exposure to various techniques, brands , possibilities etc. Initially I was concentrated on earrings, beads n pendants only. I will make different size / shape beads. Using EYEPIN or head pin connected with earwires. 


Over  couple of months I didn’t feel any uniqueness in “ Using “ kind of similar type earrings myself. I loved studs but have 2 problems:

1) that time couldn’t find TLS or Bake&bond. 

2) the stud sometimes hurts back of ears accidentally.

Brain Stormed !


My friend Nini ( she was my colleague from a small city in Kerala, later that time both of us living different parts of England. She was my first customer) suggested to use fish hook earwires to dig in the clay. So that will look rather like a stud instead of hanging. Bonus it won’t hurt you as no stud post sticking out. 

So I made a Prototype.


I removed the coil & bead from standard fish hook. Straighten the bend near eye . Made a thick disc. Put a slit on it to dig the earwires. Then smoothen the surface no metal part visible outside on back. Then did some daisy embroidery like filigree on other side . Cured it . And sent the photo to her .


She loved the Black disc earrings with red embroidery ( appliquΓ©) on it . Instantly place the order with matching necklace I had made just prior to this earrings . 


Then I made few earrings in the same way. Don’t have good pics of them sadly. 


I think I didn’t made those in in past 5-6 years because meanwhile I invested little more $$ in clay . Purchased different types of earwires. Totally forgot that I did it in the past. 

But last month I made it again. I want to make few studs . But couldn’t find my stuposts until I finished a pair like this . They were in the first place where I used to keep my supplies. But they remain hidden from my eyesight to remind me about the past experiment. I took few photos to show the steps. 

How To :

1) remove attachments from ear wires.


2) Make discs of clay . Make slit in the back. Place the earwires in the slit.


3) Using a tooth pick smooth out the slit . So the wire goes inside. Here I left the eye ( loop) visible to add dangles. Otherwise keep that too inside.


4) Textured the front part with a bead .


5) Applied acrylic paint all over the texture. Leave it for few minutes to dry. We will wipe excess paint leaving some paint in the groves of texture. This is called ‘ANTIQUING ‘ .


6) Use wet wipe to clean extra paint . 

Meanwhile I preheated my oven until desired temperature. As I use Premo / SoufflΓ© from polyform company 275 is my oven temperature. 

7) Cure ( bake ) for 45-60 minutes these are about 5 mm thick. I attached a conical jhumka as dangle on these studs. 

How To Make Conical Jhumkas?


I plan to eventually make a video tutorial for this. 

I will share my old prototype n other few earrings for reference. 

Thanks for reading,

Love,

Maneesha.
Tuesday, June 7, 2022

Fall Inspired Shiny Skinner Blend

The earrings from the Skinner blend recipe

Yeah, you heard it right. I know it’s too early for fall. I wanna make a pair of Maple leaf 🍁 earrings customized for a friend of mine who’s moving to different country. 


 Here I’m just posting the Skinner Blend tutorial only . I’m kinda physically not well . Next week I can post the tutorial for earrings.

Click To Watch on Pinterest πŸ“Œ feel free to ‘ PIN IT ‘ to your board.

Making skinner blend with polymer clay gives a mesmerizing ombrΓ© blend. People do cut triangles / curves etc to make the colors blend. This is the very basic way of doing skinner blend for your polymer Clay projects. In this tutorial I used 2 metallic Clays ( Premo Accents) which makes the sheet of clay shines well in light ✨ gives a satin kinda look. I used very little amount of clay for a mini blend which good enough for 2-3 pairs of earrings. I finished 2 pairs and some scrap left still. 


Skinner blend you can do with 2 colors or many colors of clay . Better use similar brands with same curing time & temperature. 


the chosen colors   a greenish scrap as in the video


To Make A Skinner Blend:


• Polymer Clay: few colors (equal size )

• Roller Pin & Pasta machine. 


First step in any clay art is to condition the clay until workable. This is so important otherwise the final output may not be strong. The method I adopted from Cindy Lietz is the easiest for small batches. 

• After conditioning; form drop shapes .

• Arrange the colors in a way you like

• Press one color to another on the rolling surface .

• Use roller pin to make it flat. 

• Fold the sheet upward ⤴️ every time before rolling.

• Then feed through pasta machine . Repeat the same folding until you are satisfied with the blend. 


If you prefer you can back this sheet with another solid color sheet of clay. Now you see a beautiful blend. Thanks to Judith Skinner who introduced this technique to the PC peeps. 


Thank you for watching. Please pour your reactions and pin it for later. I’m editing the earrings video, the second part of this. 


Thank you everyone for reading this.

Love you all ❤️


Tuesday, May 31, 2022

A Beautiful Yet Simple Way To Make Lapis Lazuli Jewelry

Lapis Lazuli Necklace:

Lapis one of the semi precious stones dated back to 7 th millennium BC . The birth stone for September born.

 πŸ’™ This healing Crystal helps with throat chakra n third eye chakra. 

πŸ’™ Induces intuition, psychic abilities , recalling past life etc .


πŸ“Œ MATERIALS :-


• Lapis beads

• Bead caps 

• Tube beads ( coils from Firemountain in this one)

• Connectors ( closed jump rings)

• Lot of eye pins ( depending on the length & how many layers you need )

• Clasp

• Pliers 


πŸ“Œ How To Make:-


• Make bead units of lapis & coil/ tubes . Use bead caps on either side of bead holes of lapis by sliding on eyepins. Slide tubes on another eyepins as well. ( you can use small beads or bead caps on either side of tubes as well )

• Connect these bead units till desired length.

• Add clasp. That’s it !!


Earrings :-


Now time for a matching pair of earrings.


πŸ“Œ MATERIALS :-


 Make Bead Dangles using ball pins ( head pins ) , bead caps  and a lazuli beads.


• Slide a Tube ( here coil ) on an Eyepin .


• Attach stud or any ear wire form at one end and a connector ( closed jump ring here ) on the other side. 


• Make a wrapped loop to attach Lazuli dangles on the connector. The more dense the number of beads , the prettier earrings would be. 

Another choice is to add monochromatic and ombrΓ© shades of tiny glass beads similarly to make a dense cluster.  Repeat same accents on necklace as well. 


Gonna make one ?


Regards ,

Maneesha 


Friday, May 27, 2022

Turquoise Jewelry

​Today we gonna make Turquoise necklace. What do you think you need? Turquoise beads or Cabochons , right?


Yeah we do !

But today we gonna make turquoise ourselves.

Sounds insane?? !

Yes it is … 

Because we gonna make faux turquoise from polymer clay. 


Disclaimer: These turquoise stones won’t have any healing properties  or mineral compositions . It’s just for the appearance, they look like turquoise and it may satisfy your outlook when you wear it . And you don’t have to pay huge money to have a necklace which physically look alike Crystal. 


Difficulty: Easy ( Beginners friendly).

Click to watch: https://youtu.be/cISMxFLxBRQ


Let’s Make faux Turquoise Cabochon. For that first we need to make turquoise cane . We need to follow the steps as follows: 

πŸ“MATERIALS:

• Polymer clay 

• Alcohol ink 

• Bake & Bond

• Mica pigments 


• Premo polymer Clay- Blue, white ( turquoise) , translucent, bronze / copper , soufflΓ© clay in sea glass color. The darker colors depicts impurities or other minerals found usually . Kingman turquoise is the most enchanting one . 

• To make cane : Mix turquoise and translucent clay together. If you don’t have turquoise shade . Mix white and blue until you are satisfied with the tone. Chop all clays . Mix randomly. Do Not Blend. Add alcohol ink in teakwood color. Usually everyone uses acrylic paint. But I like the way alcohol ink turned out. Hold all bits of clay together. When you slice you get Turquoise effect.But do not keep this cane for future use . Ink will absorb by clay and ends up in muddy log of cane . Make fresh.

• To Make Cabochon: cover some scrap clay with the slices of cane . 

• Make a bezel setting with metallic clay , dust with mica pigments. Thoroughly follow the video instructions.

• Bake 45 minutes to 1 hour . 275 Fahrenheit for Premo and soufflΓ©. Always preheat the oven. After curing let it cool naturally.

• Sand & buff the cane part , not metallic.

• Seal with polyurethane or resin or renaissance wax .

• Make beads similarly in a shape that you love.

• String together into a necklace.


Hope you loved the beautiful tutorial!

Happy claying πŸ˜‡πŸ’™

With love,

Maneesha 

Iris Earrings : How To ?

Polymer Clay Iris Earrings


Thursday, May 26, 2022

Work In Progress : Crystal Jewelry πŸ’™

​Here’s a sneak peek of what I’m working on this week. I spared my time for lapis lazuli. Planning to make a necklace earrings tutorial for YouTube as well. 


Supplies:

Lapis lazuli  Beads

Small Tube Beads 

Closed Jump Rings / Connectors

Eyepins 

Bead Caps 

Clasp of your choice 

Pliers

Earwires / Studs 

Ball Pins


Remember the recent BeeBeeCraft Haul . Lapis beads from them . Also I wanna remind you about the $5 off coupon when you purchase 40$ or more you will get $5 off . To redeem use the code Venera5 ; valid till 2023 March 14. 

wip

Stay Tuned For What’s Coming Along ,

Wish You Happy Art Making Week.

Share and Pin it πŸ“Œ 

Thank you,

Love,

Maneesha 

Monday, May 23, 2022

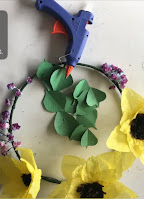
Paper Flowers Wreath

 Sunflowers Of Tissue paper


Sunflowers are one of my favourite flowers . The colors the sizes ,the way they always look at sun ,the  number of seeds they hold , edible values etc makes the sunflowers most enchanting flowers in my personal opinion. 


I got some tissue papers in yellow . Suddenly I had the urge to make sunflowers in paper. Final idea concieved becomes a wreath ..

Watch the Demo below :

I used kitchen towels and food color for Baby's breath flower and my kid's construction papers for leaves . Don't tell him .πŸ‘€


The purple food color actually gave two tones. I mixed couple of drops gel color with water. The using  a brush applied the color in the center. The outer layer of petals leached some color which turned blueish after drying . Unexpected but turned so beautiful... 


Try it and lemme know .
Regards,
Maneesha

Tuesday, May 17, 2022

The Recent Trend - Marble Polymer Clay Jewelry.

 ​I have been wondering why Marble effect ( faux stone ) earrings have becoming so popular as if Poly Clay has no other techniques . 

Over tiktok it’s on a rage . Chop some translucent clay , mix some acrylic paint, metal leaf , mica powder, liquid clay and roll to a square log . Slice . Cut with cookie cutter. Cure in the oven. Add your findings. That’s the basic steps.

I guess the reason behind popularity is :

1) How easy to make 

2) The translucency gives a crystal kinda appearance.

3) Not much supplies needed.


So I thought why should I be the odd one out ? πŸ˜†

Click πŸ‘‰πŸ½ How To Make Marble Earrings ?


Made an opaque Marble jewelry the way I mixed the colors gives a real Marbled way on the veneer. I let the acrylic colors blend somewhat together rather than leaving solid veins of paint. 


I still love claying. But not getting enough time from work and day today activities.


Enjoy your hobbies.

Don’t let it go !

Love

Maneesha 


Monday, May 16, 2022

Save $5 on BeeBeeCraft Site

Recently I have collaborated with BeeBeeCraft YouTube program. My viewers get $5 Off on your orders above $40 that’s the highlight.

So I bought a strand of Cultured fresh water pearls , lapis lazuli, Rose quartz and some lobster clasps.


Watch the video to know more details πŸ‘‡πŸΎ


What did I buy from  @Beebeecraft  ? πŸ‘‰πŸ½I got lapis lazuli, rose quartz, fresh water Pearls & lobster clasps in 4 sizes and 2 metal tones. How did I get free products ? πŸ‘‰πŸ½ I applied for their Youtube program. To apply for this you need to have at least 100 subs. If you get selected, you will get a mail with guidelines. Create a login in their site . Choose the products you want then add it to the cart. These products are free shouldn’texceed $40. After finalizing the products inform them via email. They will process your order. You will recieve the consignment within 5-10 days. After recieving make 3 videos for them including unboxing. And you share the link with them.

πŸ“πŸ“ Save $5 on your purchase $40 or more ; Use the Coupon code Venera5. valid till March 14 2023 πŸ“πŸ“
Orders above $25 gets FREE SHIPPING from BEEBEECRAFT.

Visit BeeBeeCraft Site Products I bought: πŸ’—Rose Quartz : πŸ’™Lapis: 🀍Pearls : 🀎Lobster Clasps :

Please read video description for links and details . ( Find me on Youtube viz " VENERA COLLECTIONS " .)


Hope you will surely enjoy this post.

Thank You πŸ’—

Maneesha.


Faberge Egg Style Beaded Beads

Again it comes under netted beading. Netted Beading is very beautiful either the technique looks like lace with fewer beads and can be made wider; or in tubular shape or beaded beads ( cluster of beads weaved together) . Very easy though it seems complicated at first sight.

Beading can test your patience but I do while watching TV or while talking with family. How much ever time it takes, finally worth the end result. 


Beaded Beads:

Beaded Beads can be earrings, pendants or as focal points to add an extra interest into your jewelry. Even you can make it as key chain, small tree ornaments . Plentiful options! Just be imaginative.. πŸ˜‡

Beaded Bead Eg :

To make Beaded Beads you may use different size and shapes makes that interesting every time resulting a very unique Bead. 

For the above πŸ‘†πŸΌ we will Need:

supplies required

You can follow my youtube tutorial to create this one . Check it below πŸ‘‡πŸΎ 


Written Steps :

( Note that the colored dots indicates just color of beads )


1 row : 3 x4mm Rondelle Beads & 3 seed Beads alternating. Knot to secure.

2 row : Netting seed Beads only in even numbers. Netting goes around each Rondelle. For first netting it’s only on top of Rondelle. Down side no netting.
Take 3 golden seed beads 1 Blue Seed Beads 3 golden seed beads on needle.
 ( πŸŸ‘🟑🟑 πŸ”΅ 🟑🟑🟑)  
Pass it through the next seed bead. Repeat 3 times. So all Rondelle got covered. 
Now bring the needle through 3 πŸŸ‘seed beads and πŸ”΅seed bead . Blue seed bead is to locate the center. 

3 rd : string one Rondelle connect with next πŸ”΅seed bead. Take second Rondelle connect to next πŸ”΅seed bead. Do the same for 3rd Rondelle. 

4 th : Netting. As Rondelle size (6mm) increases number of Seed beads also increases to go around Rondelle without loose thread space. 
String seed Beads πŸŸ‘πŸŸ‘πŸŸ‘πŸŸ‘πŸ”΅πŸŸ‘πŸŸ‘πŸŸ‘πŸŸ‘ on needle. Pass through the seed bead next over Rondelle. Repeat 3 times until the row complete. Bring the needle to πŸ”΅ blue seed bead in the center. 

5th row : take 1 each 6mm Rondelle connect with the seed bead ( πŸ”΅) in the center. Until 3 Rondelle done .

6th -netting as earlier πŸŸ‘πŸŸ‘πŸŸ‘πŸŸ‘πŸ”΅πŸŸ‘πŸŸ‘πŸŸ‘πŸŸ‘
7th - 6mm Rondelle again repeating previous steps.

8 th - netting. πŸŸ‘πŸŸ‘πŸŸ‘πŸ”΅πŸŸ‘πŸŸ‘πŸŸ‘
9 th row - 4 mm ( smaller ) Rondelle 

10 th - Netting with πŸŸ‘πŸŸ‘πŸ”΅πŸŸ‘πŸŸ‘
11 th - come to πŸ”΅ seed Bead , pass the thread through all 3 blue seed beads on top twice to reinforce and knot finally. 

Every steps needs a squeeze of the thread to form the shape. No loose threads. Hope this helps.

Rather than watching, seems less complicated when we actually do it .

Another Beaded Beads Earrings
When the number of rows reduced, I got a round beaded Bead. But same steps followed, bead sizes are different. Play with the size or shapes of bead or the number of rows . You get totally different results. 

Get Creative to accessorize the beads . 

Happy Beading...

See you all soon.
Love & Regards,
Maneesha