1) This I made in a Patina or vintage look.. Vary the colors according to spring or autumn theme. Use bright Mica pigments for vivid fresh appearance...
2) Second one is Gonna be a LEAF CANE in bright green and pink.
Polymer clay is a wonderful medium, you can imitate almost anything in the universe . Last week I have experimented again with Faux lava beads and two different shaped faux corals. A couple of years ago I posted a blog post on Lava beads. This time a video demonstration.
Tutorial #13 on My Youtube Channel :
In the previous post if you check you can see my tool was a cloth brush for Lava rocks. Here I have textured the beads with Epsum Salt and tooth prick. Don't worry about the salt residue. Wash well in plain water they all will dissolve well after curing.
Corals can be seen in red to peach shades, I added more yellow on one part of log made for coral but the Yellow was not enough to dominate the density of red so all appeared in same color . You will understand this while watching video. So for more realistic organic look ; add more and more yellow to the Red and Translucent mix. Make the color gradiation.
MATERIALS REQUIRED :
After Sanding
After curing wash the beads well few times in plenty of water. Pat dry and coat all corals with BLACK acrylic paint. Wash well again and sand the beads well , The paint will stay in the groves. Buff with renaissance wax for better result. One of my viewer suggested this. I applied Minwax poly urathane only.
Let "em Dry After Varnishing
Instead of spacer beads I used Jump rings in between, got this idea from Pinterest.
Crackle Technique is always amazing. There are few ways to make crackle on polymer clay. Using heat gun, partially dried or cured veneer, craft foils, African Raku by Shannon Tabor etc etc.
Here I used Black Premo Clay and Gold leaf (foil) . Those contrasted colors brings starry night effect.
You don't need much materials for this kind of bangles. Just clay, foil, wire to strengthen, bake and bond , basic tools. But needed to bake twice nearly 100 minutes i cured it in total.
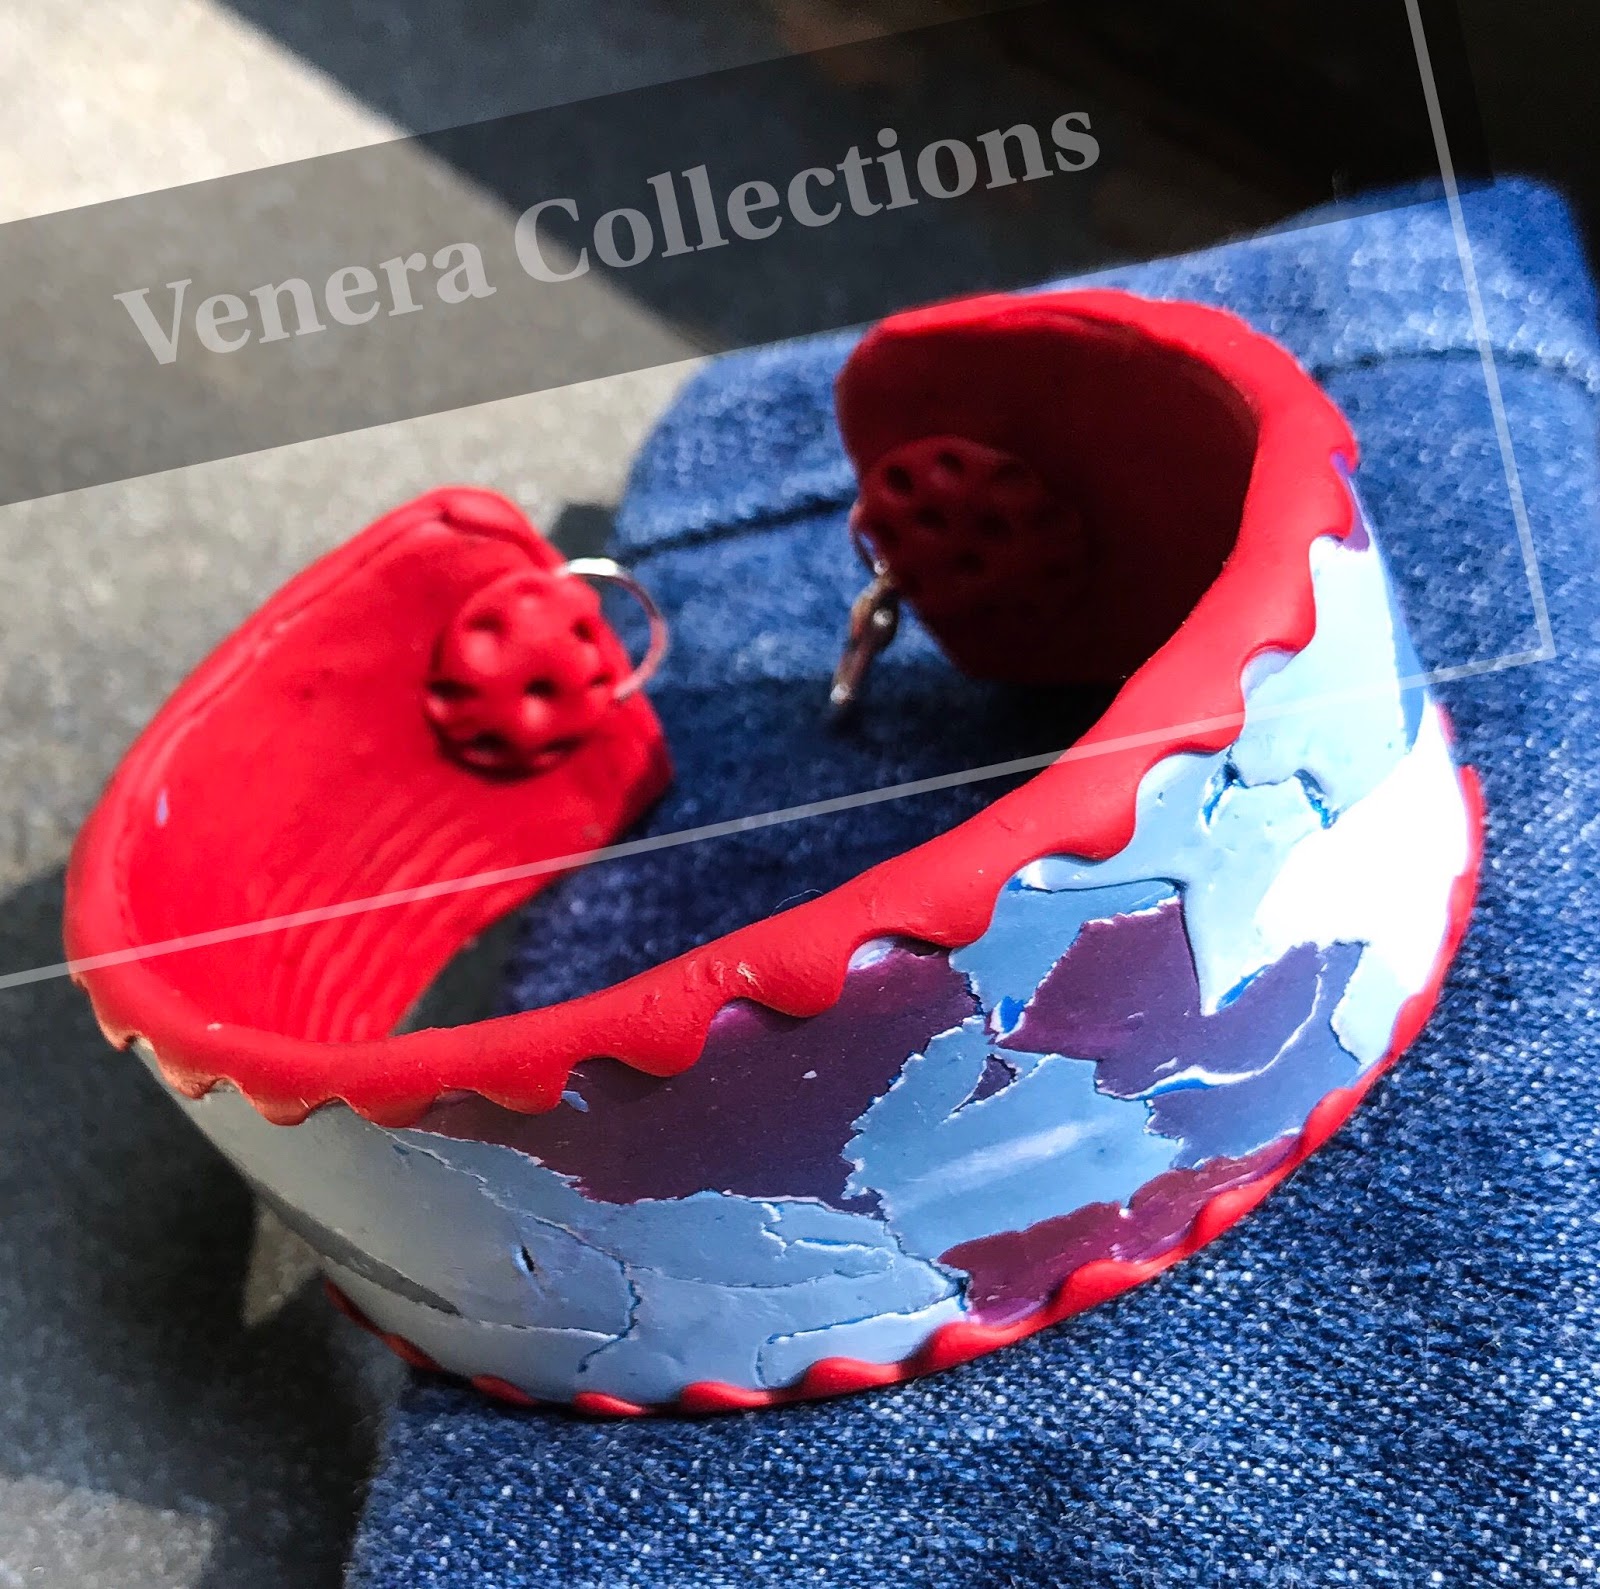
I would like to share some ideas and inspirations for July 4 or Patriotic day. As of now I made a video for making a cuff bracelet and two types of Earrings.
I will be adding more DIY ideas on same theme under the playlist " PARIOTIC JEWELRY" on my YOU TUBE channel. #11 Tutorial comes with a July 4 th Jewelry idea. Make yourself a cuff bracelet from polymer clay in the patriotic colors. The technique I used is TORN WATER COLOR MOSAIC , I made a SKINNER BLEND OF RED - WHITE - BLUE from Premo Sculpey brand Oven bake poly clay.
Check Tutorials of Anna Oriona , Ludmila , Samantha for variations of Water color technique. This particular technique introduced by Maggie Maggio.
This extra ordinary cuff in RED BLUE WHITE and their graduated color blends will blow everyone away with the magical beauty. I bought the reusable CUFF BLANKS from eminent Clay artist Teresa Salgado. That makes making cuff bracelets so easier.
Let's Get Started :
The techniques ☝ :
Skinner Blend
Torn Water Color Mosaic
Brand : Sculpey Premo & Fimo for Blue
Let's move on to make Ear rings
I will show how to use Ear ring Hoops as well as Fish hook wires. These DIYs are pretty simple too. Excuse me , I shot these in night so clarity matters a bit. Actually I wanted to remind you of these are not just about patriotic colors , you can use your artistic thoughts and color skills in implimenting your own very way ! the beads I used for these Earrings are part of Water color cuff tutorial. If you are not able to make yourself , pick your choice of beads from stores.
Do It Yourself 👇
Hope you Love these. I will make a necklace vedio as well by Patriotic Day. Thanks !!!! 💗
Hello folks, does it seems crazy !!!! Yes I went mad . Initially my plan was to make a LARIAT using my Extruder as main Tool. Later I had a thought like adding one more face to that by removing the pendant. So The pendant done on reversible Method. One side would be a dome and other version is Concave. Because i added connectors the chain can be fastened on any link. If you need a chocker length, the tail would remain long . Refer above image☝☝☝☝☝☝☝
For this, we need only few beads , the connectors will add length. I have two types of beads made with extruded strings. Both are suitable for summer. Domed Surface of pendant is also made with extruded strings. The concave is having silver finish.
Also I would like to share with you, i am uploading my tutorials on Joann's site.
If you love to have split tutorials of this 3 in 1 project check this Link.
Under my Youtube Channel you will find whole 17 minutes video too. ↡↡↡
Hope you will try this and share with ya friends too.
Seed Bead Tassels Do you Love some Bling for your clutch or car key or a jewelry ? Well !!!
I use this thread
Yesterday I made a small shoot of making Tassels from seed beads. Mine is not so Dense. Though you can add more strands. You can add a Tassel to your money purse , Bag , Keys etc.
Materials Needed:
Size 11\0 Seed Beads 5 colors
Thread
Needle
Scissors
Glue
Eyepin 1
Bead Cone 1
String colors alternating
Beading pattern:
I took Gold as accent color and chosen Pink,Magenta , Violet and Green as main colors.
1 ) String 10 beads of your first color. (pink)
2) 1 accent bead, 1 first color , 1 accent color.
3) 10 beads of second color. (magenta)
4) 1 accent, 1 second color, 1 accent
5) 10 beads of Third color (violet)
6) 1 accent , 1 third color, 1 accent
7) 10 beads of Fourth color (Green)
8) 1 accent, 1 fourth color
9) Finally String the Jingle.
10) Pass the thread back through all the beds up to top. You will get both ends of thread on our top most bead.
11) Make as much as strands you love to have.Hold all the beaded strands together and knot them.
12) Attach to an eyepin and trim extra thread.
13) Slide a Bead Cap on Eyepin , one matching bead and form a Loop with Round nose plier. Cut off extra wire , else wrap around the bead.
14) Tassels Ready...
Let's Watch How to Make Them:
There are so many possibilities.. Think creatively..


